If you have a "live" view of some discovery data in your tabulation; that is, if your tabulation was created with some Direct content from a discovery; then you will see two special effects in your tabulation:
- When the source discovery is updated in Discover, the change will flow through to your tabulation. For example, if you or another user delete the Overhead column in your Sales grid in Discover, it will be automatically removed from the linked tabulation.
- You can perform Discover-like changes on your linked data in Tabulate. These changes will not flow back into the source discovery, they are simply a way to explore your data in Tabulate. For example, you can show the drop zones in Tabulate and change the "shape" of your tabulation, changing which columns are shown or the order of measures.
Note: This functionality is only available if you have created a "live" link (also known as a Direct link) between your tabulation and a discovery. For more information, see Drag discoveries into Tabulate Pro.
Context Menu options
Where your tabulation contains a Direct link to a discovery, the following additional menu options are added to the context menu when you right-click a grid of linked data:
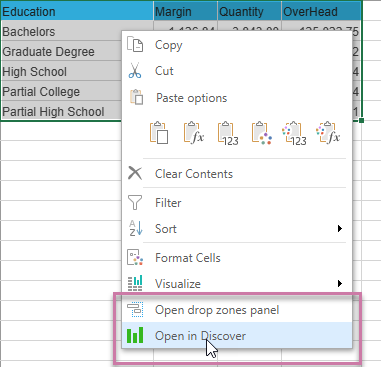
- Open drop zones panel: Open the drop zones panel in Tabulate to change the shape of your data by dragging its chips into different columns to change rows to columns, alter the sequence of measures, and so on. These changes do not affect the source discovery, they are only relevant to your view in Tabulate.
- Open in Discover: Open the visual in Discover to make changes to it. Making changes to a linked discovery in Discover will affect the tabulation in Tabulate.
Tip: The other context menu options are described elsewhere. They include Clipboard Tools, Sort and Filter options, Cell Formatting, and "Visualize" (which is used to visualize the data).
Making Changes in Discover
When changes are made to the linked discovery, by you or by another user (where it is shared), those changes are reflected in the data that appears in the tabulation on save.
- Right-click Open in Discover to open the linked discovery as a new tab in the Pyramid environment.
- You can make changes to this discovery as in any discovery (add filters, remove or add values, and so on). For more information, see the Discover help.
Linked data in Tabulate
Moving chips in your drop zones
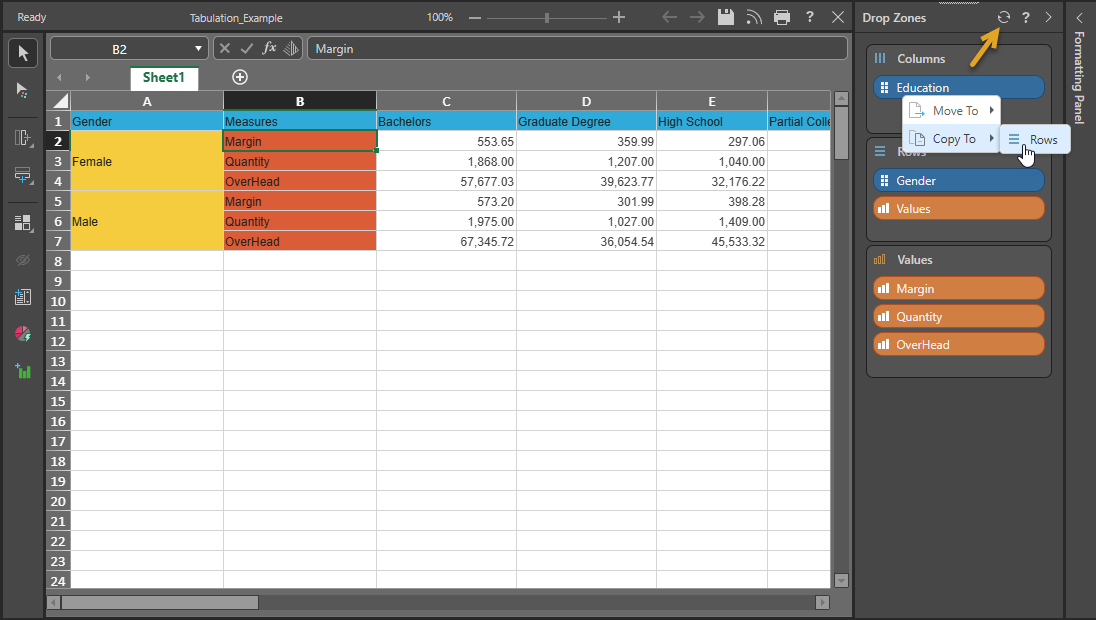
You can make changes to your tabulation to explore your data. These changes do not affect your source discovery and can be reverted using the Revert button (orange arrow below) at the top of the Drop Zones panel itself.
- Right-click Open drop zones panel to open the panel to the right of the canvas. You can move the chips in the drop zones to change your tabulation:
Revert drop zones
Clicking the Revert button (orange arrow) "reverts" the grid to reflect its current shape in Discover.
Drop zone functionality
Although the drop zone functionality is similar to that seen for Visualization Panels, it is limited in use:
- You can use the right-click menu to Move or Copy your chips between the sections.
- You can use drag and drop to move your chips in the same way.
Your changes are reflected in the current view. Your changes are not reflected in the original discovery.